

How To Force Apps To Sd Card On Samsung Tablet Without Rooting
By rooting any Android phone or tablet, you can unleash its hidden capabilities and enhance its performance using root apps, custom mods, and ROMs. At DroidViews, we keep sharing tutorials to help users achieve root privilege on their device. Just a day ago, I wrote a guide on rooting Samsung Galaxy Tab A 7″ with model number SM-T280. Today, we'll see how we can root Galaxy Tab A 10.1 WiFi SM-T580 (2016) safely on Android Marshmallow. Besides rooting, we'll also install TWRP Recovery on the device.
Disclaimer
Rooting your Samsung Galaxy Tab A 10.1 (SM-T580) will void its warranty and trip the KNOX counter. We have taken utmost care in writing the steps in the tutorial, yet we do not take any responsibility for any mishap. Please follow the guide carefully and everything will be fine. Give a reading to the tutorial and make all preparations before proceeding with the rooting steps.
Preparations
- Download Odin 3.12.7 and extract the downloaded file.
- Install Samsung USB Drivers on your computer if you've not installed already.
- Download the TWRP Recovery for Galaxy Tab A SM-T580: twrp-3.1.1-0-gtaxlwifi.img.tar
- Download the SystemMode SuperSU package file and copy the file to your device storage: Magisk-v15.3.zip
- Also download the no-verity file (only for Nougat firmware): no-verity-opt-encrypt-5.1.zip
- Enable USB Debugging and OEM unlocking on your Tab from Settings> Developer options. To enable Developer options on your Tab A, go to Settings> About> Build number and tap it 7 times.
- Important: Make sure you don't have Factory Reset Protection enabled in your Google account or you may never be able to boot again!
- Backup all apps and data present on the internal storage of your device.
- Ensure at least 60% battery on your device.
Steps to Install TWRP & Root Galaxy Tab A 10.1 WiFi SM-T580
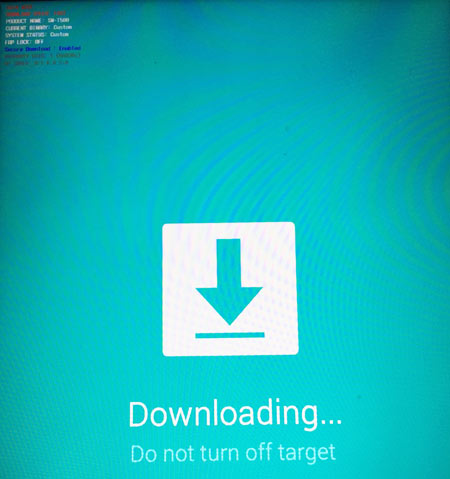
- Power off your Galaxy Tab A and boot it into the Download mode by pressing and holding the Volume Down + Home + Power buttons at the same time for a few seconds. When you see the warning screen with an exclamation mark, press the Volume Up key to enter the Download or Odin Mode.
- Open the Odin folder and launch Odin3.exe as administrator.
- Now connect your device to computer using the stock USB cable that came with your device.
- When a successful connection between your Tab and your computer is established Odin, the ID:COM port on Odin will turn blue.
- Now click the 'Options' tab on Odin and uncheck the Auto Reboot option.
- Click the AP button in Odin and add thetwrp-3.1.1-0-gtaxlwifi.img.tar file to it.
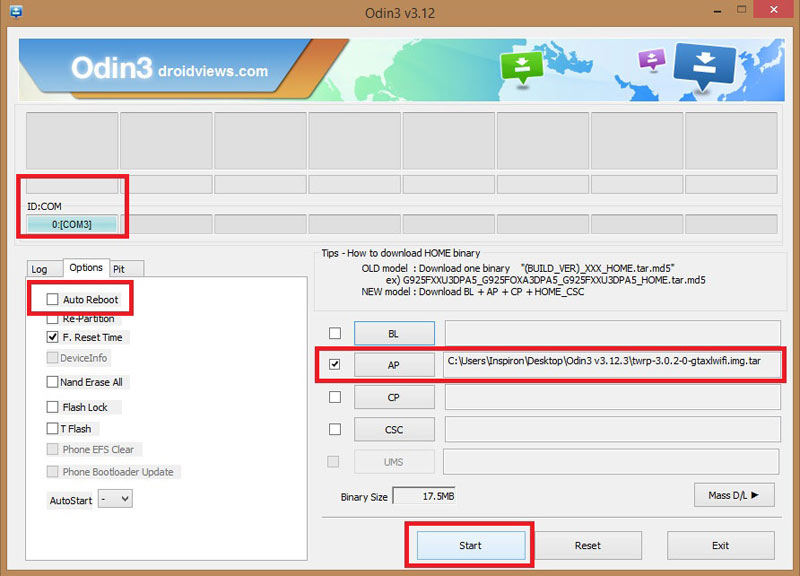
- Make sure your Odin setup matches our screenshot and click the Start button to initiate installation.
- When the recovery file is installed, you'll get PASS!! message in Odin.
- After installing the TWRP file, when the phone is still in the download mode, press and hold the Volume Down + Home + Power buttons at the same time and immediately swap to Volume Up as soon as the screen goes blank/black while still pressing the Home and Power keys. Keep the 3 keys pressed until you get into TWRP Recovery.

- Now connect your Tab (while booted in TWRP mode) to your PC and transfer no-verity-opt-encrypt-5.0.zip and Magisk-v15.3.zip files using MTP mode (via USB cable).
- Go to the main menu in TWRP and selectWipe> Format Data. After that, go back and tap the Reboot> Recovery option.
- When TWRP boots up, tap the Install button and installno-verity-opt-encrypt-5.1.zip. (Note: If your Tab is running the Marshmallow firmware, you don't need to install "no-verity-opt-encrypt-5.1.zip" and install Magisk directly. Flash the no-verity file only if your device is running Android Nougat firmware.
- When the file is installed select the wipe cache option and then selectReboot> Recovery again.
- Now tap the Install button, locate and select Magisk-v15.3.zip and install it.
- When Magisk is installed, select the Reboot> System option.
When your Samsung Galaxy Tab A 10.1 (SM-T580) boots up, it will have root access and TWRP recovery installed on it. You're now ready to take advantage of root apps and enjoy custom ROMs on your device.
If you want to verify that your Samsung Galaxy Tab A has been properly rooted or not, you can use the 'Root Check' from the Play Store.
[googleplay url="https://play.google.com/store/apps/details?id=com.jrummyapps.rootchecker"/]
Reader Interactions
How To Force Apps To Sd Card On Samsung Tablet Without Rooting
Source: https://www.droidviews.com/root-galaxy-tab-a-10-1-wifi-sm-t580-2016-and-install-twrp-recovery/
Posted by: elliotalcon1969.blogspot.com
0 Response to "How To Force Apps To Sd Card On Samsung Tablet Without Rooting"
Post a Comment